Carrying a backpack with 30lbs or more can transform a pleasant trek into a painful ordeal if not properly adjusted. Hip pain, in particular, is a common complaint among hikers and backpackers, often stemming from poor load distribution and an ill-fitting pack. The key to mitigating this discomfort lies in understanding how your backpack should interact with your body, especially under heavy loads. This guide will walk you through the essential steps to adjust your backpack to prevent or alleviate hip pain, ensuring your focus remains on the trail, not your discomfort.
Understanding Load Distribution and Hip Pain
Your hips are designed to bear weight, making the hip belt the most critical component for carrying heavy loads. Ideally, 70-80% of your backpack’s weight should rest on your hips, not your shoulders. When this weight distribution is off, your shoulders and back bear too much strain, leading to muscle fatigue, nerve compression, and radiating pain, including in the hips.
Hip pain can manifest as aching, chafing, or pressure points where the hip belt sits. This is often exacerbated by tight hip belts that constrict circulation or loose belts that allow the pack to sag, pulling down on the shoulders. The goal is a snug, comfortable fit that transfers the load efficiently to your sturdy hip bones.
The Foundation: Torso Length and Initial Fit
Before even thinking about individual straps, ensure your backpack is the correct size for your torso length. An incorrectly sized pack will never fit properly, regardless of how much you adjust it.
- Measure Your Torso: Use a flexible tape measure to find the distance from your C7 vertebra (the most prominent bone at the base of your neck) down to the top of your hip bones (iliac crest), specifically the level of the bony shelf that protrudes out from your sides.
- Adjust Torso Length (if applicable): Many modern backpacks feature adjustable torso lengths. Set this to match your measurement.
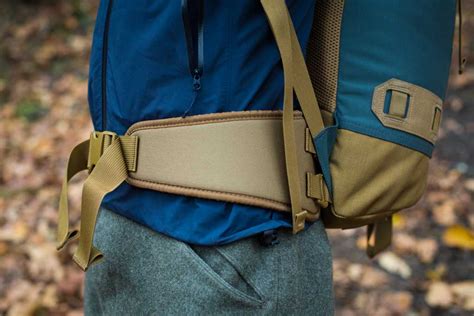
- Initial Hip Belt Placement: Loosen all straps. Put on the backpack and center the hip belt so its top edge sits about an inch above your iliac crest. When cinched, the padding should hug your hip bones comfortably, not ride up into your stomach or sag onto your thighs.
Fine-Tuning with a Heavy Load (30lbs+)
Once the basic fit is established, loading the pack with the actual weight you’ll be carrying is crucial for accurate adjustments. Simulate your typical load with gear and water.
1. The Hip Belt: Your Primary Weight Bearer
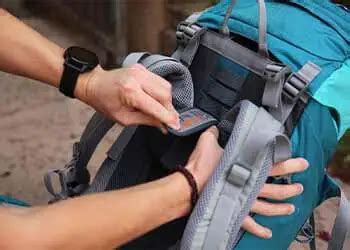
- Cinch Firmly: With the pack loaded, tighten the hip belt firmly, but not uncomfortably so. It should feel secure, with no slippage when you move. The main buckles should be centered.
- Padding Coverage: Ensure the padded wings of the hip belt wrap around your hip bones, providing maximum contact area for load transfer. There should be no gaps, and the belt shouldn’t pinch.
2. Shoulder Straps: Stability, Not Support
- Light Tension: Gently pull down on the shoulder strap adjusters until the pack feels stable against your back. The shoulder straps should conform to your shoulders, but not bear significant weight. You should be able to slide a finger or two underneath them with a heavy load. If they dig in, the hip belt isn’t carrying enough weight.
3. Load Lifters: Pulling Weight Closer
- Angle and Tension: These straps connect the top of your shoulder straps to the upper part of the pack body. Pull them forward and down until they are at roughly a 45-degree angle. This pulls the top of the pack closer to your back, preventing it from flopping backward and shifting the load upward, making it feel lighter and more stable. Don’t overtighten, or they’ll pull the hip belt off your hips.
4. Sternum Strap: Lateral Stability
- Comfortable Placement: Fasten the sternum strap across your chest. Adjust its height so it sits comfortably across your sternum, usually a few inches below your collarbone. This strap helps pull the shoulder straps inward, preventing chafing and improving stability, especially on uneven terrain. Do not overtighten, as it can restrict breathing.
Common Mistakes and Troubleshooting Hip Pain
- Hip Belt Too Loose: If the hip belt isn’t snug, the pack’s weight will sag and transfer to your shoulders, causing shoulder and hip pain as the pack bounces. Cinch it tighter.
- Hip Belt Too Tight/Wrong Placement: An overly tight hip belt can compress nerves or restrict blood flow. Ensure it’s firm but comfortable and sits over your hip bones, not your soft abdomen.
- Incorrect Torso Length: This is the root of many fitting problems. If your pack is too short, the load lifters won’t work effectively. If too long, the hip belt will sit too low.
- Over-Reliance on Shoulder Straps: Remember, shoulder straps are for stability, not carrying the primary load. If your shoulders are aching, loosen them and ensure your hip belt is doing its job.
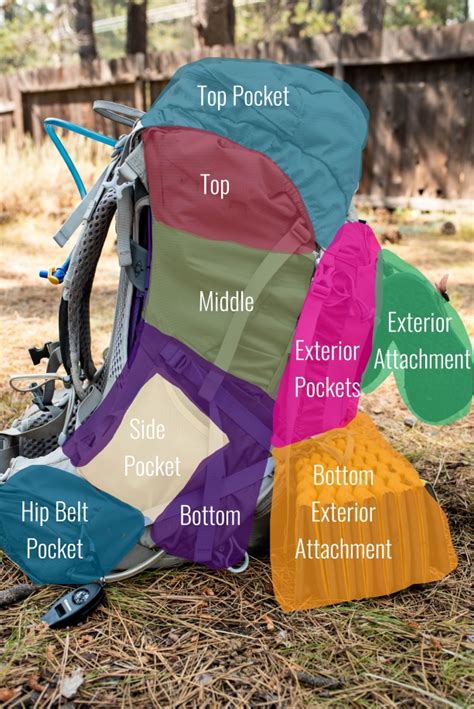
- Poor Packing: Heavy items should be packed close to your back and between your shoulder blades to maintain your center of gravity. Lighter items can go further away or at the top/bottom.
Beyond Adjustments: Strengthening and Awareness
While proper adjustment is paramount, other factors contribute to hip pain:
- Core Strength: A strong core helps stabilize your body and better manage the load.
- Glute and Hip Flexor Flexibility: Stretching these muscles can prevent tightness and discomfort.
- Footwear: Supportive hiking boots can impact your gait and overall body alignment.
- Listen to Your Body: If pain persists, take breaks, lighten your load if possible, and re-evaluate your pack fit.

Conclusion
Successfully carrying a 30lb+ load without hip pain is an achievable goal with the right approach to backpack adjustment. It requires patience, a systematic approach, and an understanding of how each strap contributes to load distribution. Take the time to fine-tune your pack at home with a realistic load, and don’t be afraid to make minor adjustments on the trail as your body and the terrain change. Your hips will thank you, allowing you to fully enjoy the adventure ahead.