The Silent Invader: Why Mold Thrives in Your Hydration Reservoir
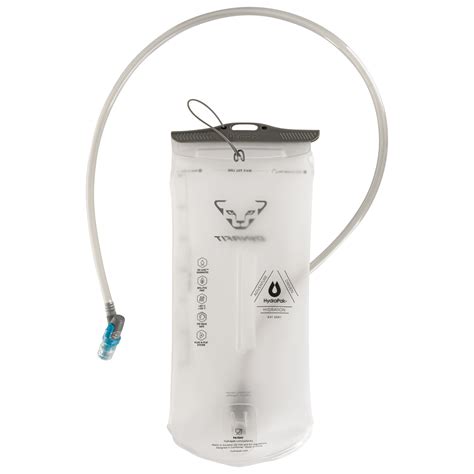
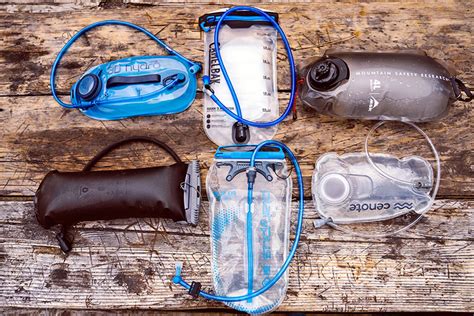
There’s nothing quite like the convenience of a hydration reservoir for staying quenched on the trail, but the dark, damp environment inside can quickly become a haven for mold and bacteria if not properly cared for. A slimy, black, or green interior doesn’t just look unappetizing; it can also pose health risks and ruin your gear. Preventing mold is straightforward, but it requires diligence and a few key steps after every single use.
Immediate Action: Don’t Let it Sit
The golden rule of mold prevention is to never let your reservoir sit with water in it, especially after a long hike or bike ride. As soon as you’re done, empty any remaining liquid. A quick rinse with clean water is the absolute minimum you should do if you can’t perform a full clean immediately. This flushes out sugars, electrolytes, and other residues that mold loves to feed on.
Thorough Cleaning: Beyond a Simple Rinse
For a truly mold-free reservoir, a thorough cleaning is essential. This involves more than just water. Here’s a step-by-step guide:
- Disassemble: Remove the bite valve, drinking tube, and any other removable parts. This allows for access to all nooks and crannies.
- Wash with Soap: Use warm water and a mild dish soap. For reservoirs, specialized cleaning tablets (often oxygen-based) are also very effective at breaking down residues and sanitizing without leaving a chemical taste.
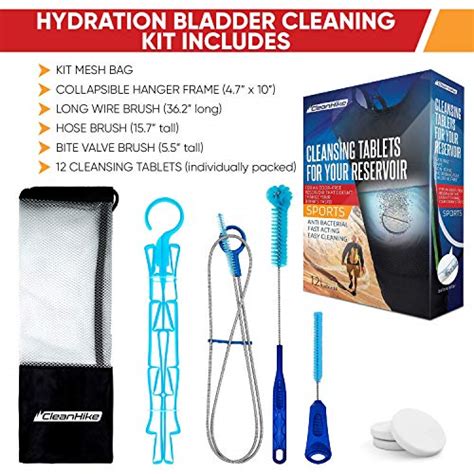
- Scrubbing: A dedicated reservoir cleaning brush kit (including a long brush for the tube and a smaller brush for the bladder) is invaluable. Scrub all internal surfaces of the bladder, the inside of the tube, and clean the bite valve thoroughly.
- Natural Alternatives: If you prefer not to use harsh chemicals, a solution of warm water and a tablespoon of baking soda, or a mix of white vinegar and water (1:4 ratio), can also be used. Let it sit for 20-30 minutes, then scrub.
Rinse, Rinse, Rinse: Removing Residues
After cleaning with soap or other solutions, it’s crucial to rinse your reservoir multiple times with clean, fresh water. Fill it up, shake vigorously, and drain. Repeat this process at least 3-4 times to ensure all cleaning agents are completely flushed out. Leftover soap can lead to a soapy taste in your next drink and can even provide a new food source for mold if not fully removed.
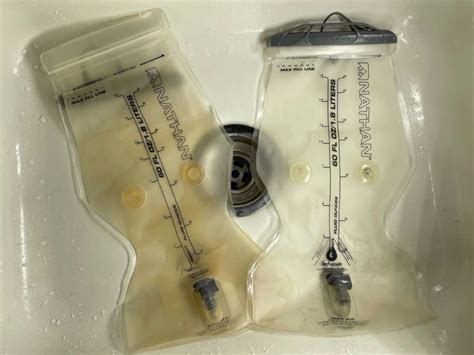
The Most Critical Step: Complete Drying
Moisture is mold’s best friend. Ensuring your reservoir is completely dry before storage is the single most important step to prevent mold growth. Do not rush this step.
- Air Dry Thoroughly: After rinsing, hang the bladder upside down or use a reservoir drying rack (often included in cleaning kits) to allow maximum airflow. Insert something inside (like a paper towel roll or a specialized drying hanger) to keep the sides from sticking together.
- Tube Drying: The tube is particularly prone to retaining moisture. Hang it vertically, or use a thin drying brush to push out any remaining water droplets. Some people swing the tube vigorously to force water out.
- Bite Valve: Ensure the bite valve is open or disassembled to allow air circulation.
- Patience is Key: Allow at least 24-48 hours for complete air drying in a well-ventilated area, away from direct sunlight which can degrade materials over time.
Proper Storage: Where and How
Once your reservoir is bone-dry, proper storage further safeguards against mold. Do not fold or roll it tightly. Store it:
- Loosely: Keep the bladder open or lightly inflated if possible, preventing sides from touching and trapping any residual moisture.
- In a Dry Place: A cool, dry, and dark cupboard or gear bin is ideal. Avoid humid basements or garages.
- Separately: Store the tube and bite valve separately from the bladder if practical, or ensure they are completely disconnected to maximize airflow.
When Mold Strikes: Salvage or Replace?
If despite your best efforts, you find mold has taken hold, a more aggressive cleaning might be necessary. A diluted bleach solution (1 tsp bleach per liter of water) can be used, soaking for 30 minutes, followed by extensive rinsing (at least 5-6 times) and thorough drying. However, if the mold is persistent, deeply stained, or you’re uncomfortable with bleach, it might be time to replace the reservoir for health and safety reasons, especially if the mold is black.
Conclusion: Consistency is Key
Preventing mold in your hydration reservoir boils down to a consistent routine of immediate rinsing, thorough cleaning with the right tools, meticulous rinsing to remove all cleaning agents, and above all, ensuring complete and total dryness before storage. By making these steps a habit, you’ll extend the life of your gear and ensure every sip on your adventure is clean and refreshing.